

Koralkingdom.com
Aquarium Alarm Auto Top off Kit, Fish Tank Smart ATO Water Pump Auto Refill Water and One-Key Drain Water, Water Level Monitor Two Pairs of Protection Sensors for Saltwater Freshwater Tank
Aquarium Alarm Auto Top off Kit, Fish Tank Smart ATO Water Pump Auto Refill Water and One-Key Drain Water, Water Level Monitor Two Pairs of Protection Sensors for Saltwater Freshwater Tank
Save an additional 10% with a subscription below
Couldn't load pickup availability
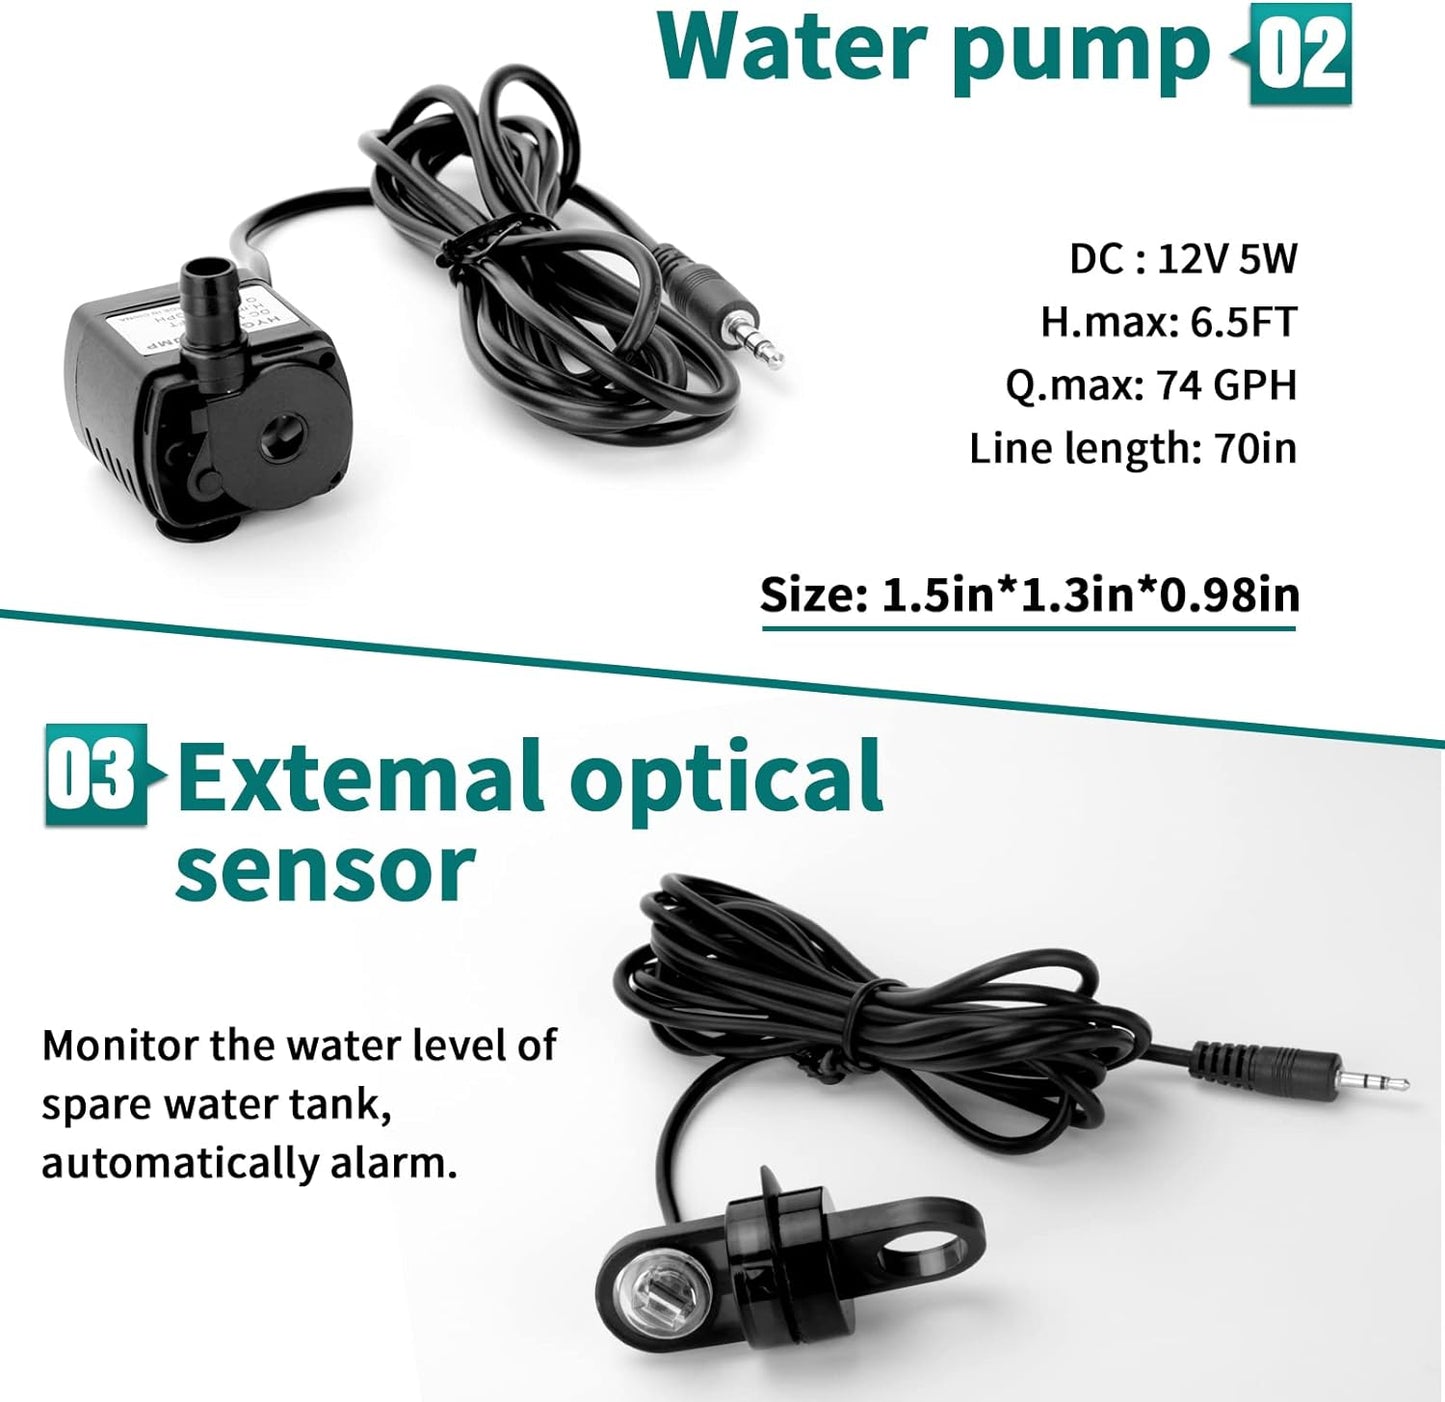
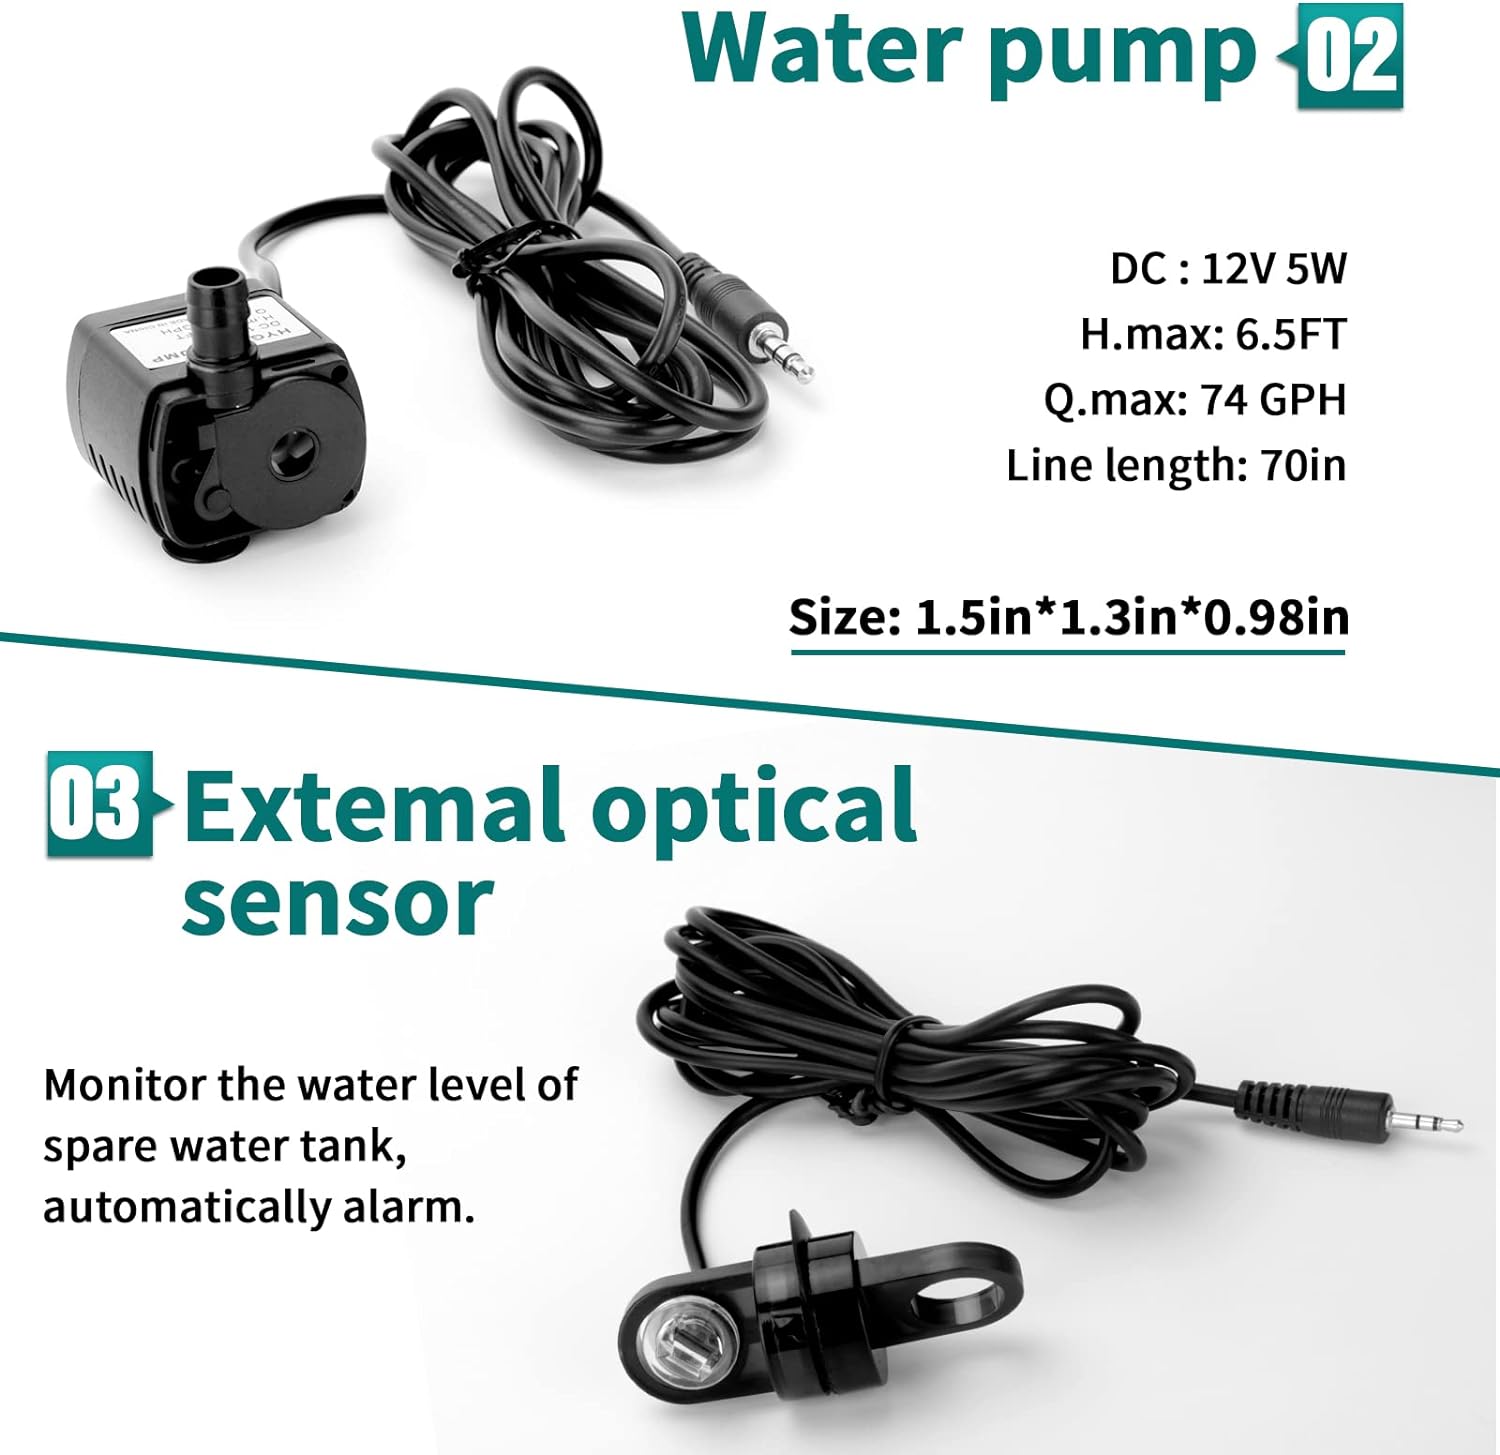
- 🐟SOUND ALARM: New security technology, two optical sensors monitor the water levels, double protection, can attract your attention quickly. When it occurs below situations, it will make a loud beeping noise to warn you: ① The water pump that placed in the bucket is out of water. ②Water pump's electric wire loose. ③External sensor is out of water. ④Fish tank water level is higher than the auto top off monitor pump.
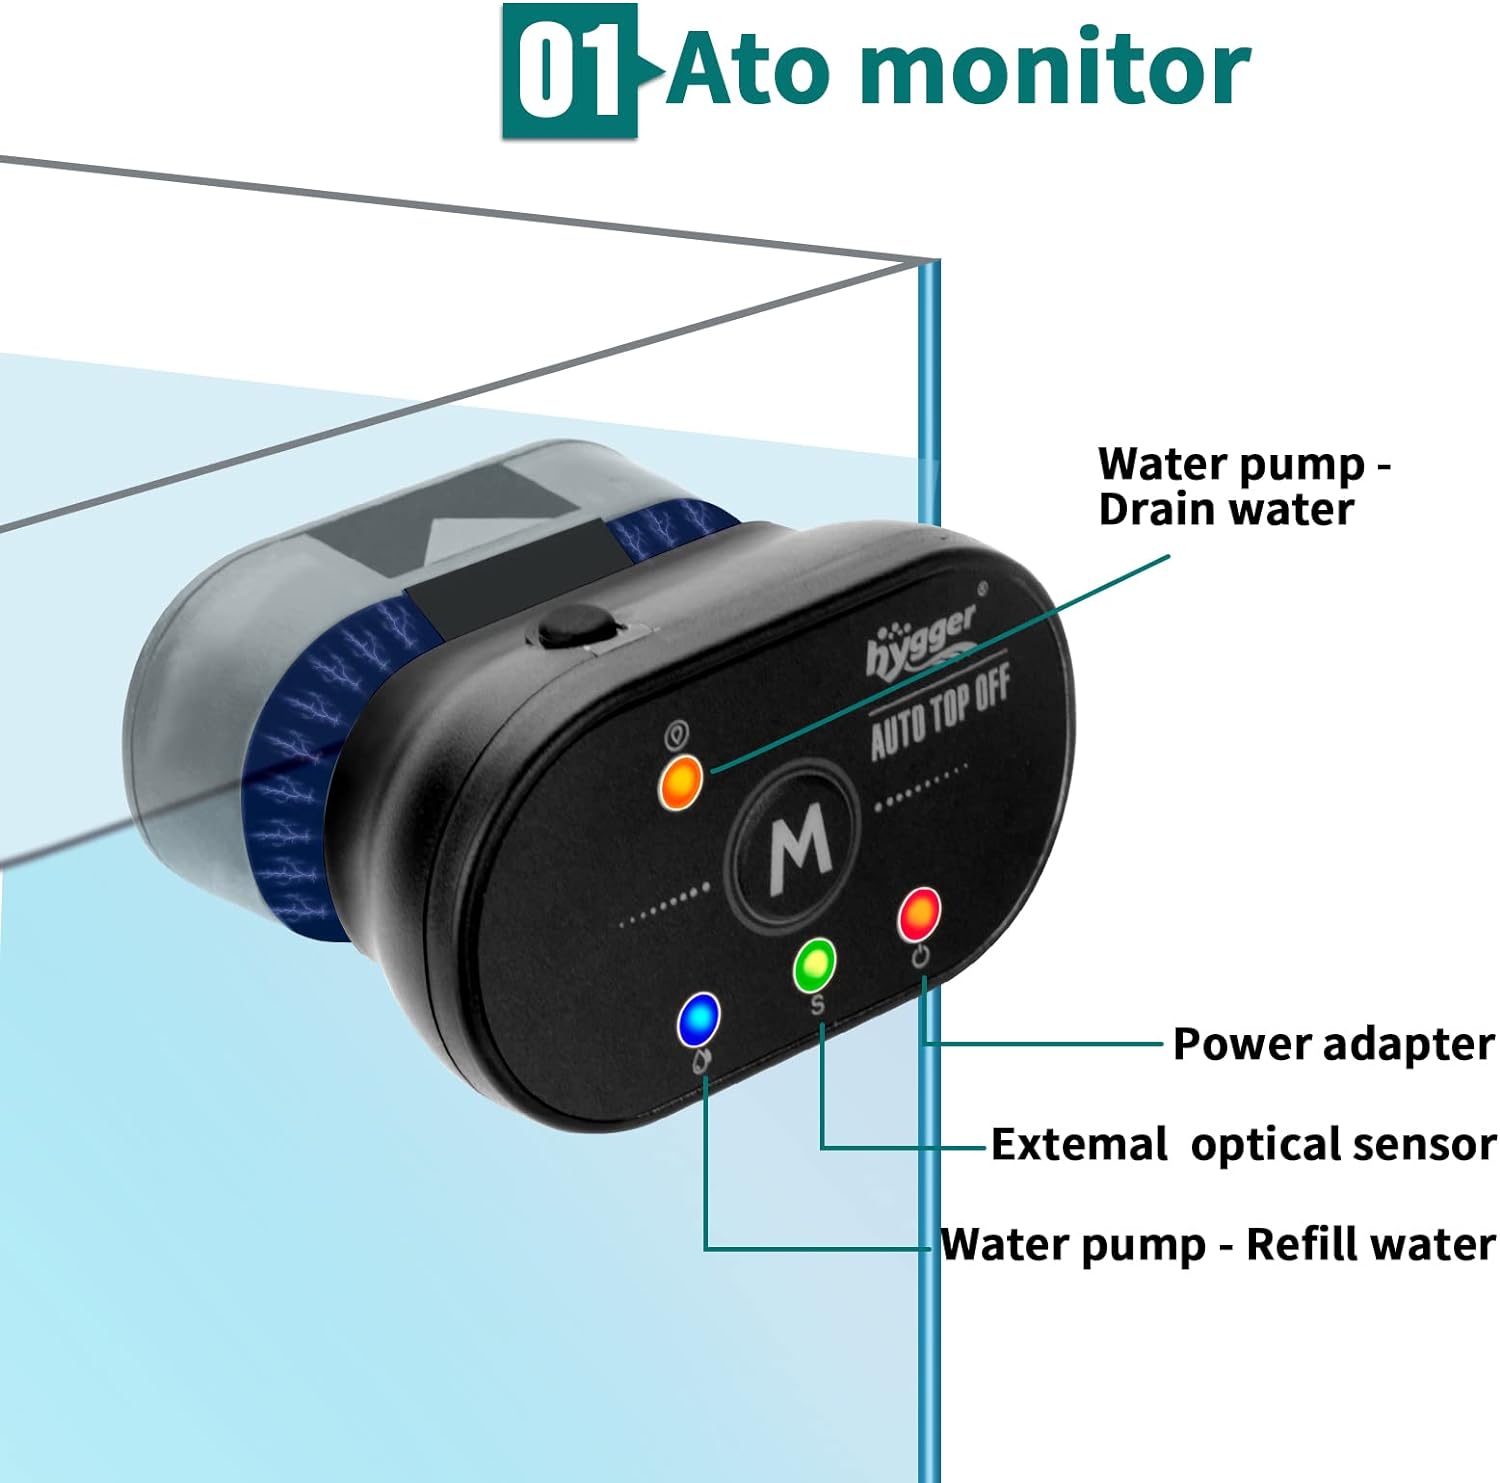
- 🐠LED INDICATORS ALARM: The red light is constant brightness, which means it is working normally,off is not ok. If other lights flash, it indicates that there is an issue with the device, which needs to be checked and corrected with reference to the manual. YELLOW LIGHT: water pump drain water; BLUE LIGHT: water pump refill water; GREEN LIGHT: external optical sensor; RED LIGHT:power adapter.
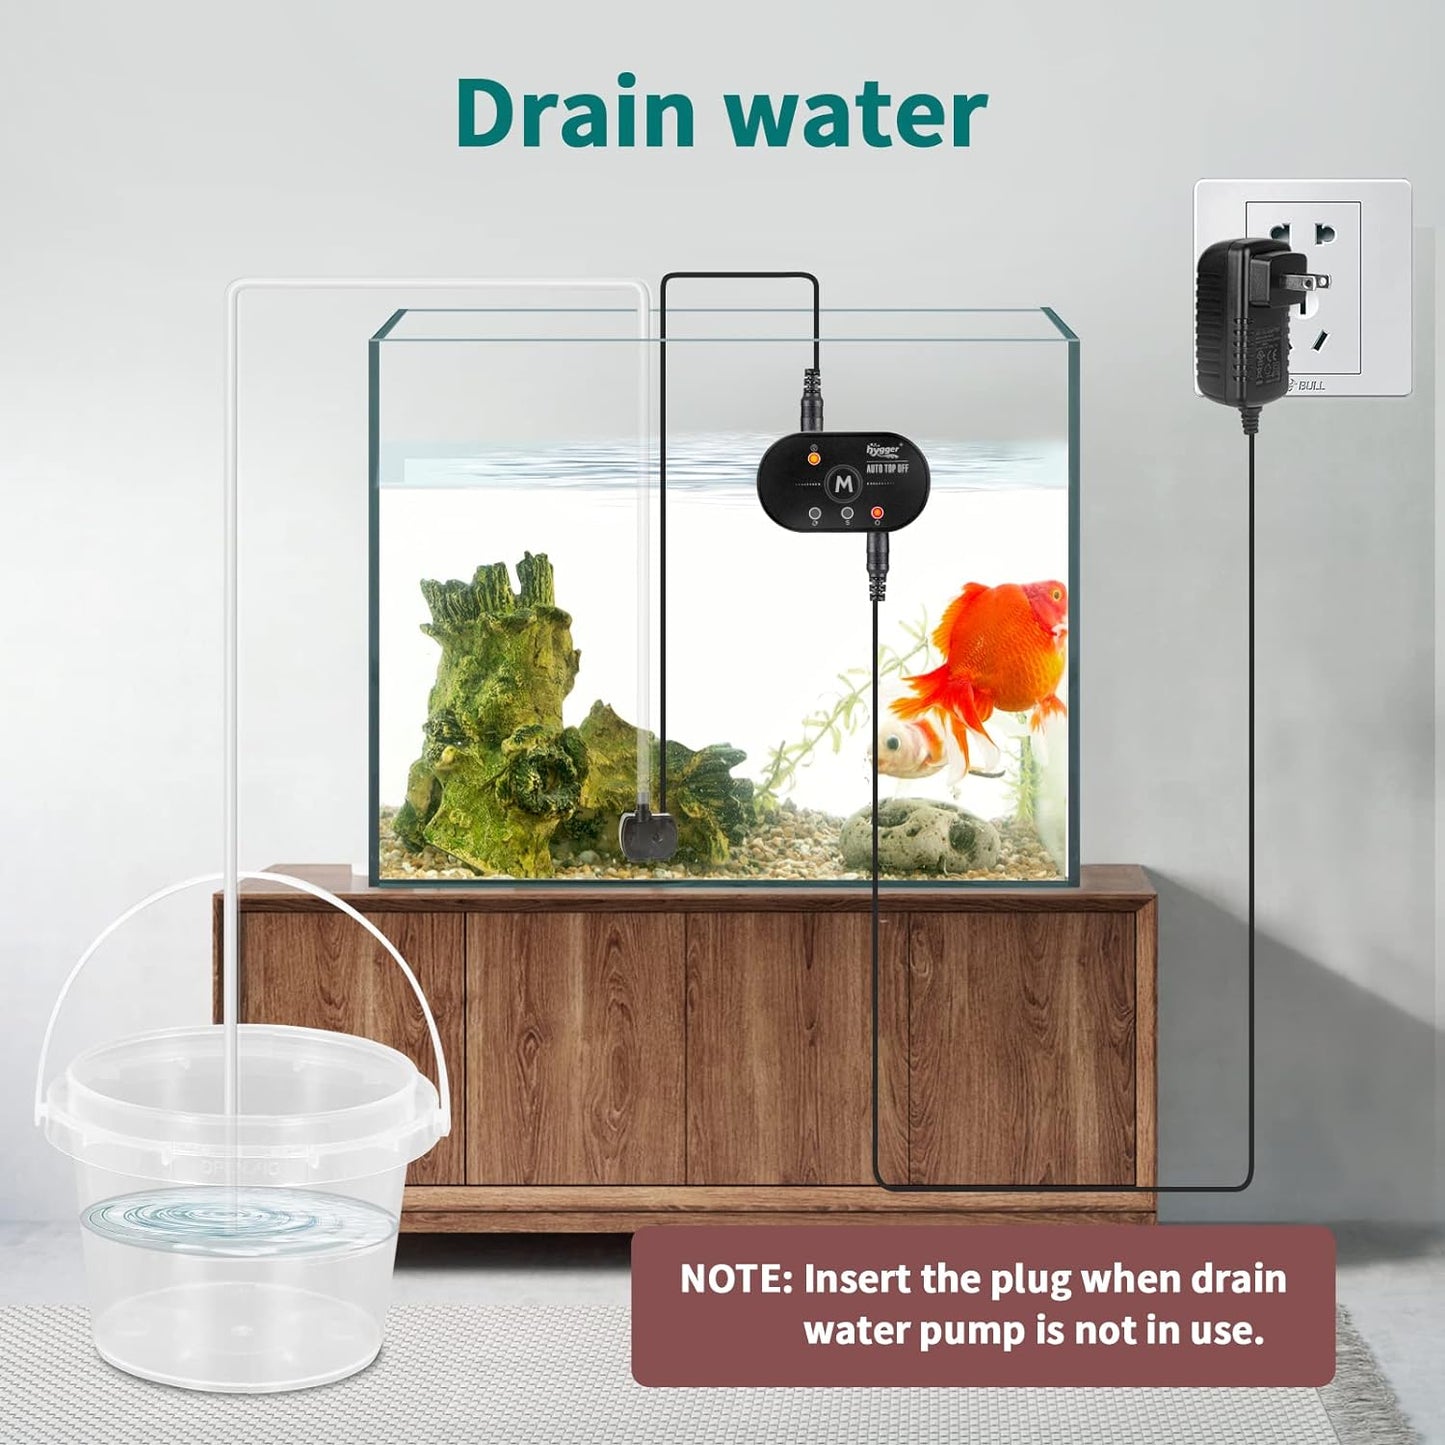
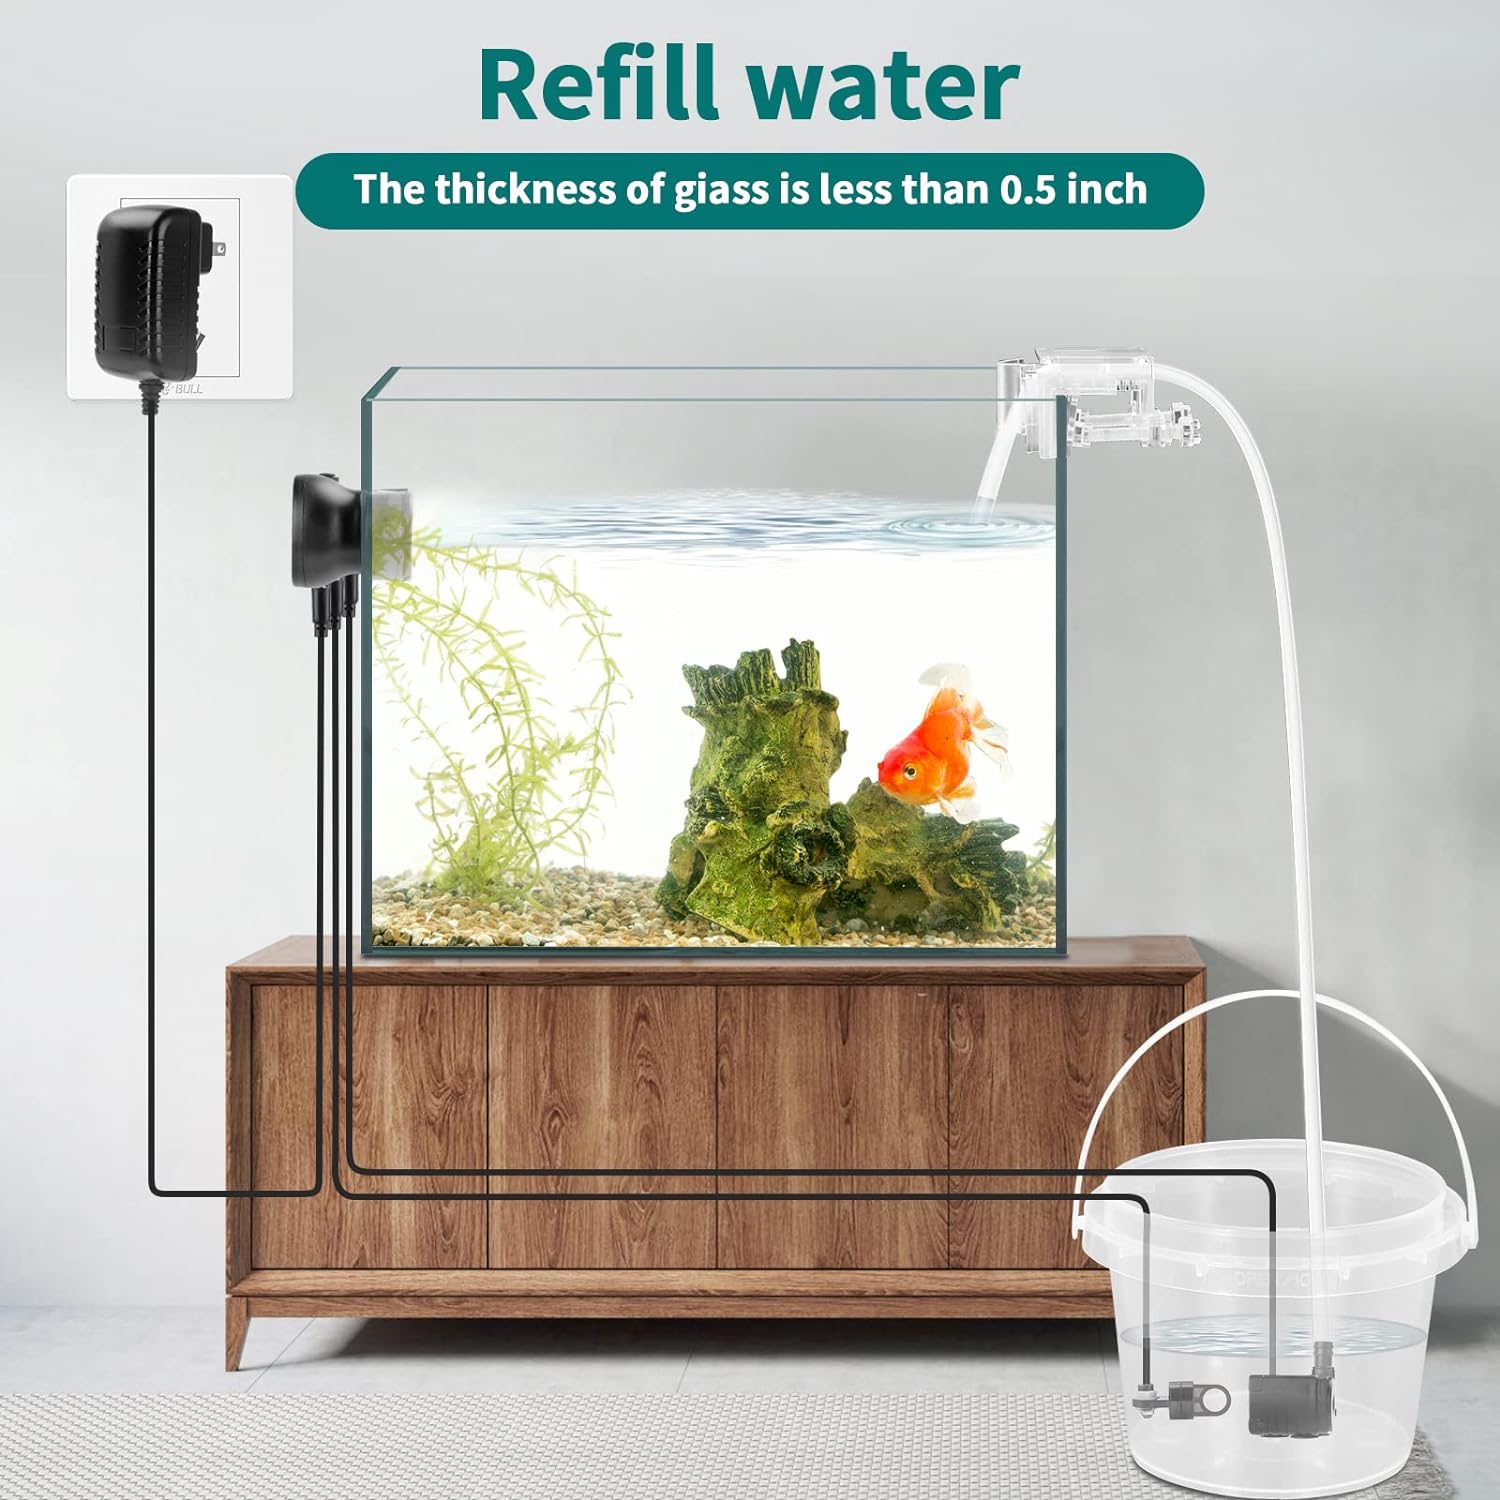
- 🐡DOUBLE APPLICATION: Auto refill and one-key drain water. Put the water pump in the fish tank, and plug the water pump cord into the upper(Yellow light hole) to drain water. On the contrary, put the water pump into the reserve water tank and plug in Blue light hole for auto refill water, and plug in external optical sensor to avoid water shortage in the reserve water. “M” button, PAUSE/CHANGE WORKING MODE.
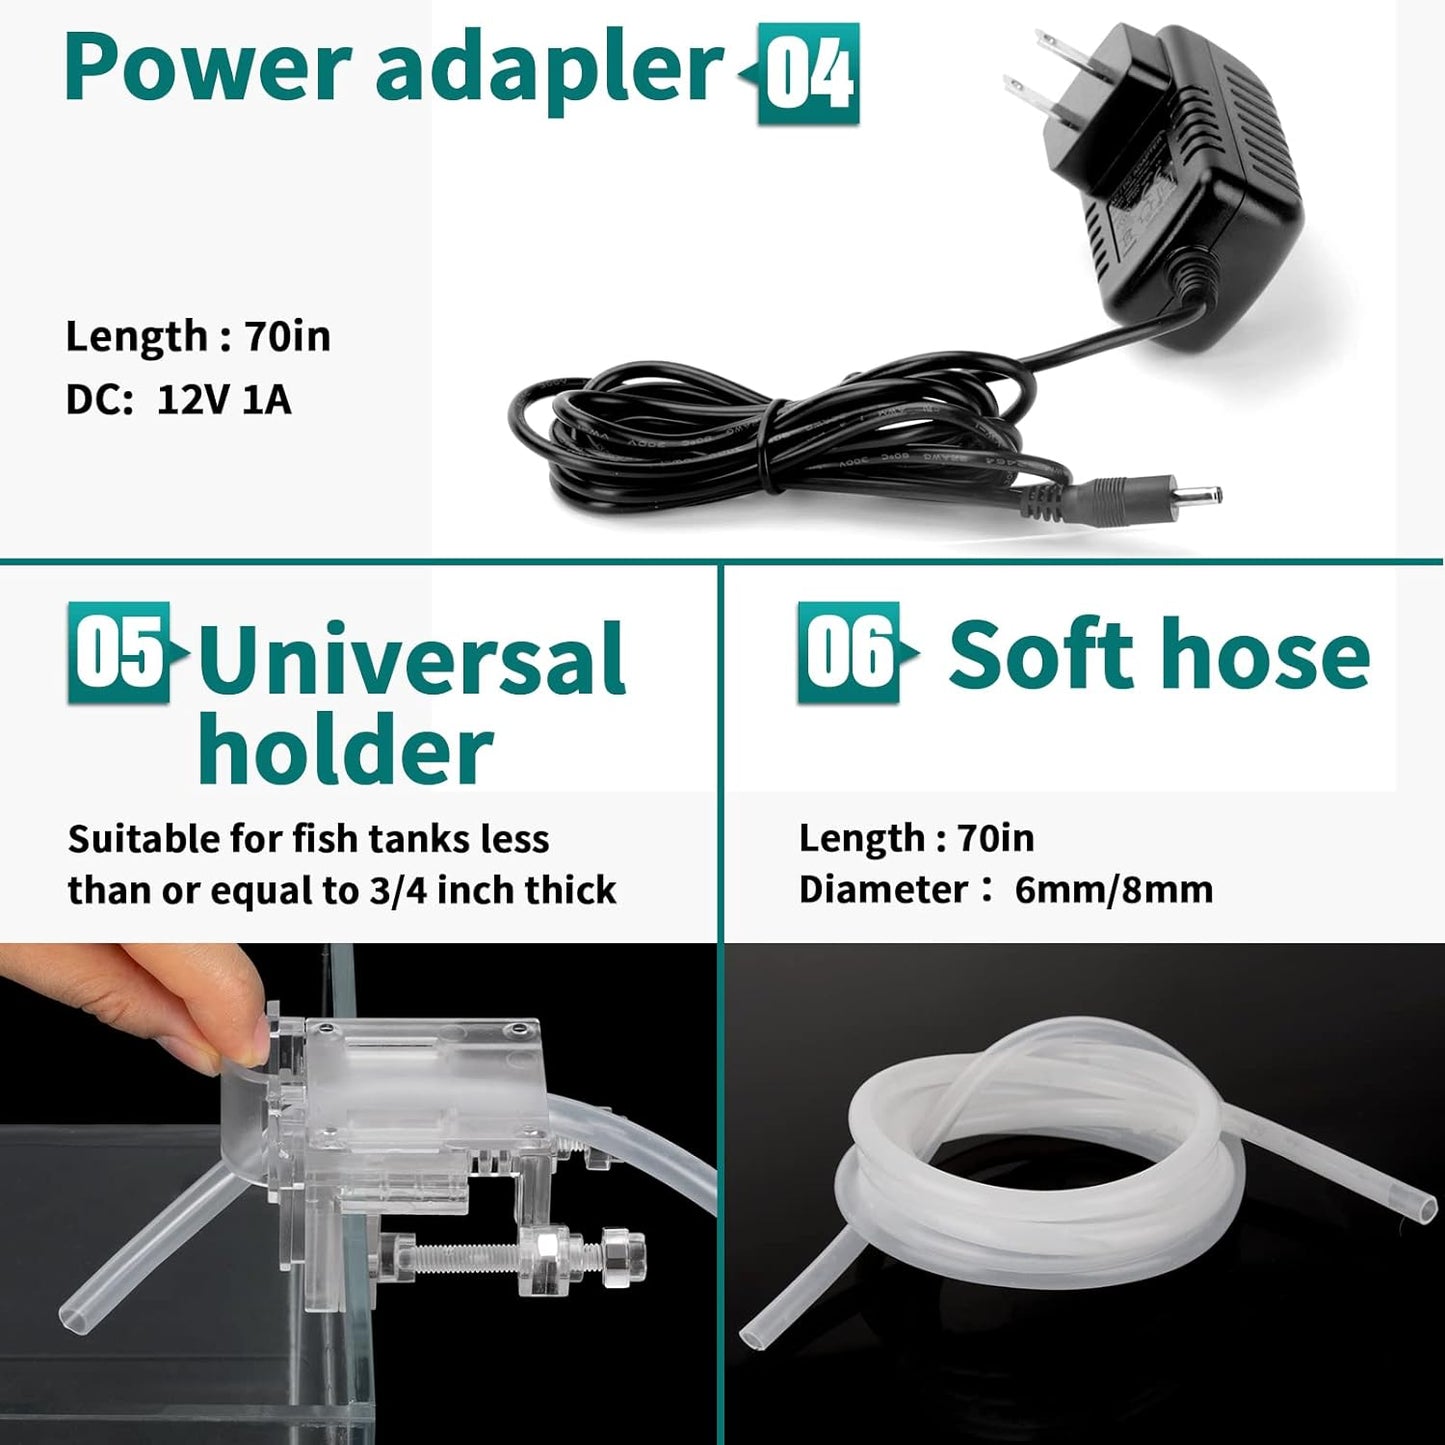
- 🐢SIMPLE TO USE: Easy to install and use, no complicated programs. Connect water pump, external sensor and power supply to monitor and it’s ready to run. Suitable for saltwater and freshwater tanks(up to 60 gals). Can be installed in a cabinet filter or directly on the aquarium edge. Because of monitoring, no longer have to worry about the lack of water in the spare water tank placed in a hidden location.
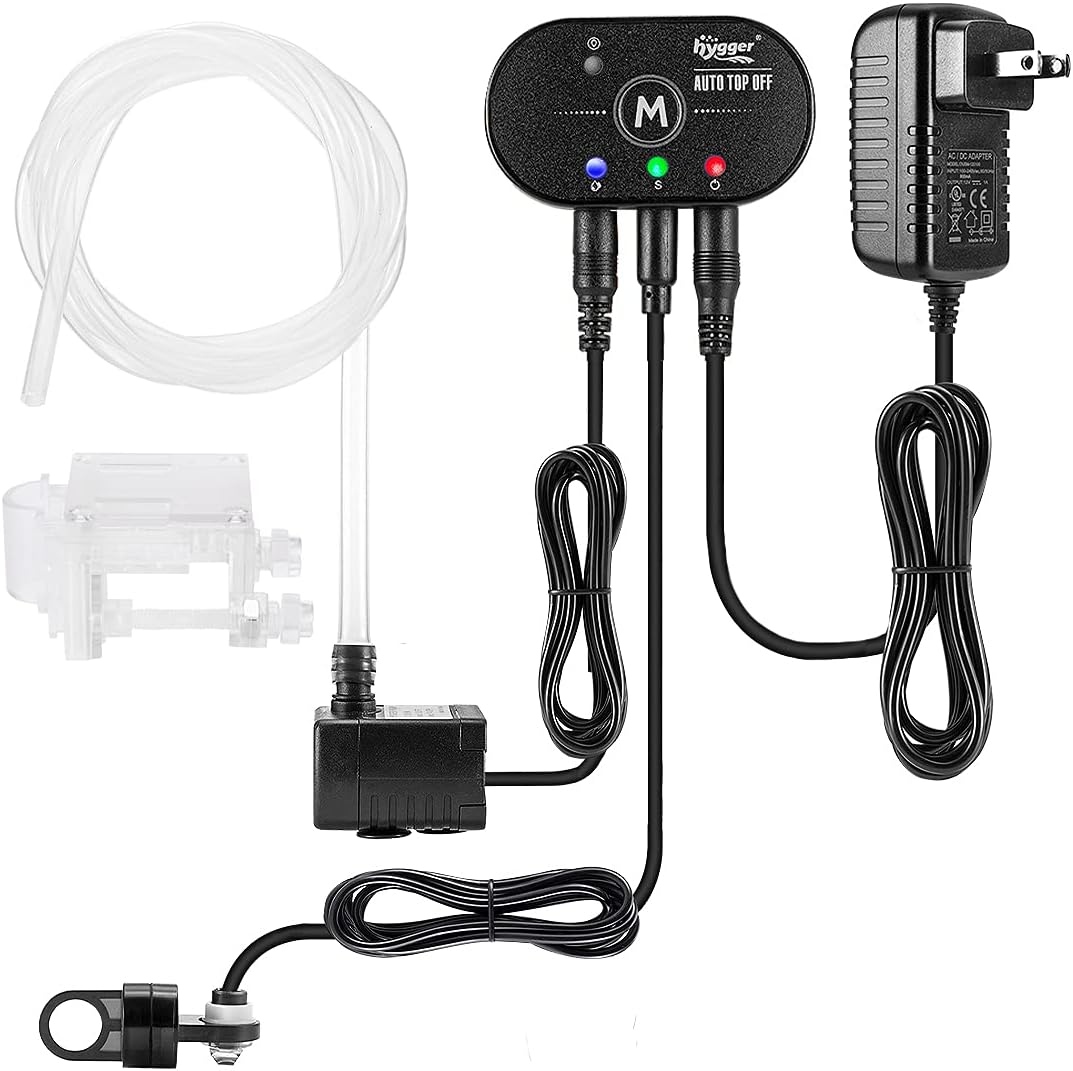
- 🦐QUALITY MATERIAL: ATO MONITOR * 1,super strong magnetic, firmly fixed on the wall of the fish tank (≤12mm). WATER PUMP * 1, DC 12V 5W, H.max:6.5FT, Q.max:74 GPH. HOSE * 1; EXTERNAL OPTICAL SENSOR * 1,widen the edge, the monitoring is more precise. POWER ADAPTER * 1,DC 12V 1A. UNIVERSAL HOLDER *1, for 3/4 inch thickness tank, hose holder. USER MANUAL *1.
Product Description
SAFETY: Light Flashs and Beeping Alarm
Connect the water pump cord
| Connect the external optical sensor cord
| Connect the power adapter cord
| Connect the water pump cord
|
HOW TO INSTALL THE MONITOR
| In order to make the product monitoring more accurate and avoid errors, please clean the fish tank wall where the monitor is placed and the two sides where the monitor is fixed on the fish tank wall during the first use. And it is recommended to clean regularly. | Put the monitor into the tank and outside the tank respectively, move them horizontally until they are overlapped, and never overlap the inner and outer parts directly. Because the magnetic force in hygger product is very strong. | Make sure that there are no obvious bubbles in the fish tank water near where the monitor is placed. It will affect the judgment of the sensor and cause incorrect or non-refilling of water. |
|
HOW TO INSTALL THE UNIVERSAL HOLDER
| Put the holder on the wall of the fish tank; Tighten the screws to fix; | Align the clip with the protruding slide, and install the hose clip; | Insert the hose; | Install the last hose clamp. |
TIPS
| If the external sensor is placed in a spare water tank with glass, please slide the installation horizontally. The thickness of the glass wall of the fish tank is recommended to be ≤0.15in. | If you are using a bucket and the thickness is very thick, you can put all the external sensors in the bucket instead of placing them separately. | The small black button is to prevent water from entering the hole, so please save it when not in use. |
|
INSTALL CORRECTLY (Place the monitor horizontally)
NO: Three holes face up | NO: Put vertically | NO: Put oblique |